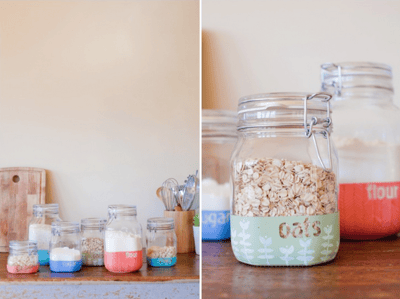
These jars are a quick and easy way to spice up your kitchen storage (or any storage, really)! The best part is they're super cheap, easy to create and they go with our Go Green Friday post on creating a paperless kitchen - check back with us for that post tomorrow!

Photo & DIY via: This Little Street
Here’s what you’ll need:
- Jars
- Spray paint
- Masking and painter's tape
- Freezer bags
- Letter stickers (ones that can be easily unstuck - the blog's author used foam ones)
- Sharpies
- Clear Gesso to prime and matte varnish if desired
- Place your masking or painter's tape around your jar at the desired height
- Place your stickers on the jars (if you are using square jars, it may be helpful to start with the last letter on the corner and spell the word backwards)
- Cover up to top of each jar with a freezer bag and tape into place with masking tape (make sure your hold is secure so that no paint can get through)
- Spray paint your jars (you will need to do several coats of paint to cover any runs)
- Make sure the paint is totally dry
- Remove your bag and letters (you may need to use a knife to break off some of the paint from around the letters - if any paint comes off, you can touch it up with a brush)
- Break out your sharpie and design away
- Make some more!

